Toplabz FAQ
Frequently Asked Questions
Portal
First login
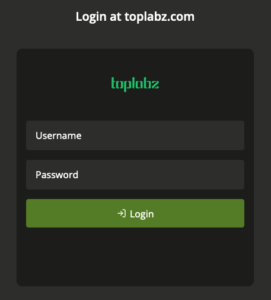
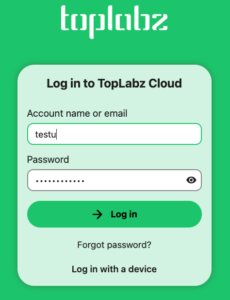
After you receive your new login details, please go to: https://portal.toplabz.com
In the login screen enter the username and password you received.
Upon first login, you will be requested to change your password.
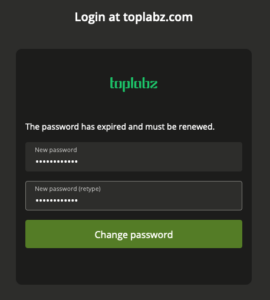
Please select a password with a minimum of 10 characters, at least 1 uppercase letter, at least 1 lowercase letter and at least 1 number. The password cannot be the same as the password that was sent to you. Once you complete this step you will be logged into the portal with your new password. It is recommended you change your password regularly. If you did not change your password for 6 months, you will be forced to change it.
Portal sections
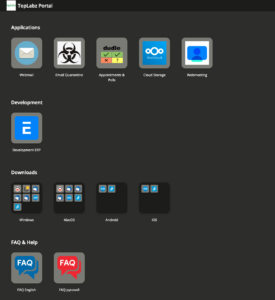
The portal consists of 3 or 4 main sections:
Applications: Web interfaces of all Toplabz applications
Development: Applications that are under development (optional)
Downloads: desktop and mobile clients for Email, groupware and other collaboration tools
FAQ & Help: Getting started, Frequently asked questions and help
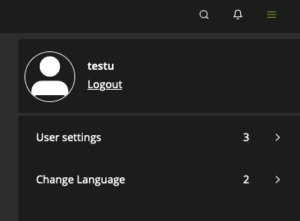
Portal menu
In the top right corner of the screen there is the portal menu. The portal menu gives you access to following functions:
1. Logout
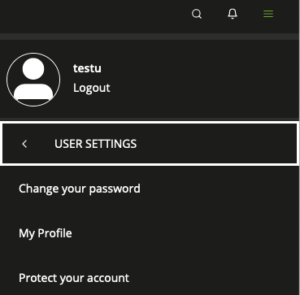
2. User settings
a. Change your password
b. Fill out your profile: This is the information your colleagues will see about you
c. Set your recovery email address: In case you forget your password, you can set an email address here that will be used to send a password recovery email that will allow you to change your password.
3. Change portal language: Currently only English and German are available.
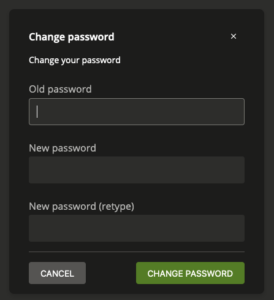
Changing your password
In order for you to change your password, you need to provide your old password.
Your new password must meet the following criteria:
– Minimum 10 characters
– At least 1 upper case letter
– At least 1 lower case letter
– At least 1 number
– The password cannot be the same as one of your last 3 passwords
You will be asked to change your password at least once every 6 months
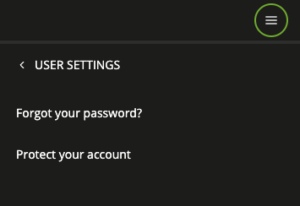
Forgot your password – password recovery
Before you can use the ‘Forgot password’ function, you need to set a recovery email address. This can be your thermotechno.eu email or a different email address.
In order to do this, please go to the portal menu and click ‘Set your recovery email address’ in the user settings menu. After confirming your identity, you can provide a recovery email address here.
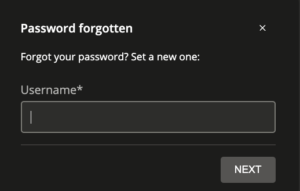
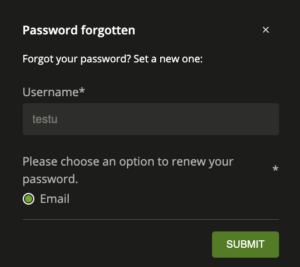
You can now use the password recovery function before you log into the portal, by going to user settings – Forgot your password? In the menu.
Choose your recovery method: Email
You will now receive a token by email. Copy and paste the token in the following dialog and choose a new password.
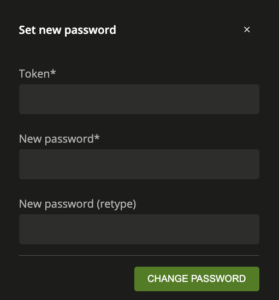
Your new password must meet the following criteria:
– Minimum 10 characters
– At least 1 upper case letter
– At least 1 lower case letter
– At least 1 number
– The password cannot be the same as one of your last 3 passwords
You will be asked to change your password at least once every 6 months
Email and Groupware
What desktop client to use
In the portal you can find the Webmail application, which support Email, calendaring, contacts and notes functions. This is a fully functional client, and in principle there is no need to install a client on your device. You may want to install a client on your device however if you want to have offline access to your mailbox, calendar or contacts.
Here is a list of desktop clients with their features to help you decide which client to use:
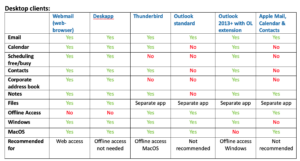
Recommended clients:
– User that always works online (for example only in the office): Webmail or Deskapp
– Windows user that wants to work offline: Outlook with OL Extension. You can use Thunderbird if you do not have outlook available.
– Mac user that wants to work offline: Thunderbird
What mobile client to use
If you want access to your mailbox, calendar or contacts on your mobile device, you may want to configure a mobile client.
Here is a list of mobile clients with their features to help you decide which client to use:

Configuring webmail
You can access webmail from the portal by clicking the webmail icon, or directly through
https://webmail.toplabz.com
If you already logged into portal, you will not have to provide credentials, otherwise you will be asked to log in with user
In the upper-right corner you can configure settings, which allows you to:
– Set language and look and feel
– Set out of office
– Configure calendar
– Configure delegates
– If you have email aliases you can configure the addresses you send from
– Configure Notifications
– Configure Files plugin (see Cloud Storage)
Configuring Deskapp
Download Deskapp from portal and install on Windows or MacOS. On MacOS, depending on your security settings you may get a security warning, which you will have to dismiss in the security and privacy section in System preferences.
After Installation, create a profile:
Profile name: Choose a name
Email address: firstnamel@toplabz.com
Username: firstnamel
Password: your password
Webapp address: https://portal.toplabz.com/webapp
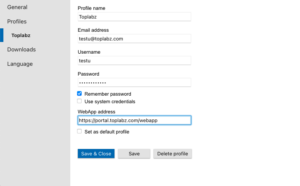
You can now sign into your mailbox. Deskapp has all the functions of the webmail application (see webmail for more details).
Configuring Outlook with Kopano outlook extension
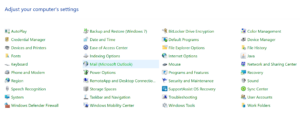
Download OLExtension for portal and install on Windows. After the installation, open the windows control panel.
Choose ‘Mail (Microsoft Outlook)’
Now Choose ‘Email Accounts…’
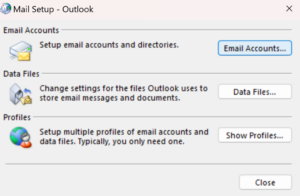
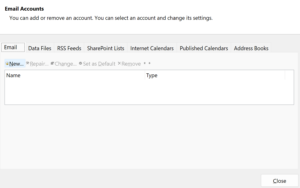
You will get a list of configured email accounts, click ‘New’
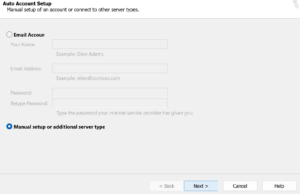
In the next screen choose the option for ‘Manual Setup or additional server type’
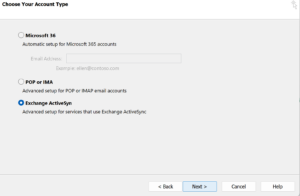
In the next screen please choose ‘Exchange ActiveSync’
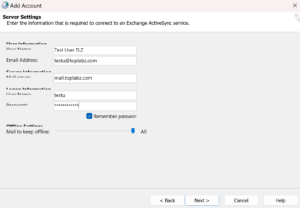
Now fill out your account information:
Your Name: Firstname Lastname
Email Address: firstnamel@toplabz.com
Mail Server: mail.toplabz.com
User Name: firstnamel
Password: Your password
You should now see ‘Congratulations, all tests completed successfully. Click close to continue’
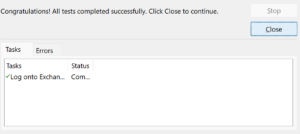
Now open outlook and your mailbox will load.

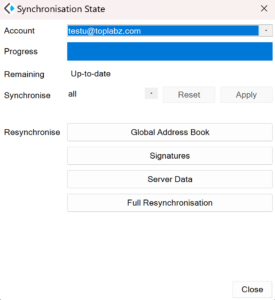
Note the ‘Kopano’ menu item, this enables the following additional functions in outlook:
– Synchronizing your mailbox
– Synchronizing address book from server
– Synchornizing your signatures from server
– Full resynchronization (this can take a long time with large mailboxes)
Configuring Thunderbird
Download Thunderbird from portal and install on Windows or MacOS.
After Installation, create a profile:
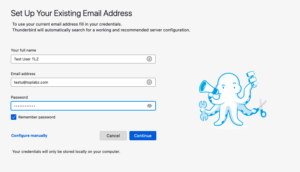
Your full name: Firstname Lastname
Email address: firstnamel@toplabz.com
Password: your password
Click ‘Continue’. You should now see ‘Configuration found at email provider’
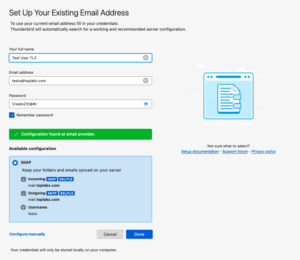
Click ‘Done’. You should now see ‘Account successfully Created’
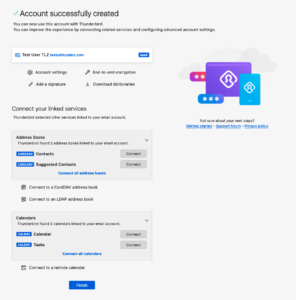
Below you will see linked services that are available, such as address books and Calendars. Please click ‘Connect’ to connect your address book(s) and Calendar(s)
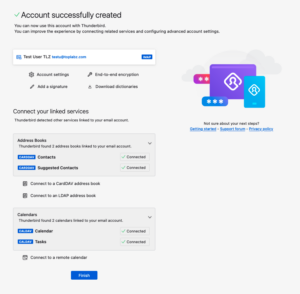
Now click finish and your mailbox is connected. Your email, calendar and address book will now synchronize.
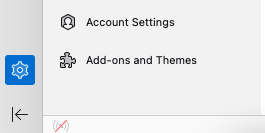
Optionally you can turn off the start page message when thunderbird launches by going to Account Settings and unchecking the checkbox under ‘Thunderbird Start Page’

Configuring generic desktop clients
Account details:
Name: Firstname Lastname
Email address: firstnamel@toplabz.com
Username: firstname.lastname
Password: Your password
Incoming mail server:
Incoming email protocol: IMAP
Incoming email server: mail.toplabz.com
Incoming email port: 993
SSL/TLS: Yes
Authentication: username/password
outgoing mail server:
Outgoing email protocol: SMTP
Outgoing email server: mail.toplabz.com
Outgoing email port: 587
SSL/TLS: Yes
Authentication: username/password
Calendar:
Protocol: caldav
Server: calendar.toplabz.com
Port: 443
SSL/TLS: Yes
Authentication: username/password
Contacts:
Protocol: carddav
Server: contacts.toplabz.com
Port: 443
SSL/TLS: Yes
Authentication: username/password
Configuring Samsung Mail/Calendar/Contacts
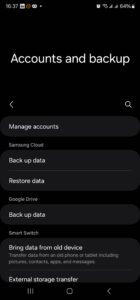
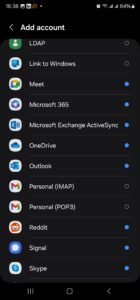
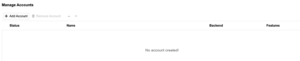
Go to the ‘Settings’ app on your Samsung device. Click ‘Accounts and Backup’ and then ‘Manage Accounts’. Choose ‘Add account’ and choose account of type ‘Microsoft Exchange ActiveSync’.
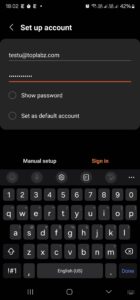
Fill in your email address and password and click ‘Sign in’
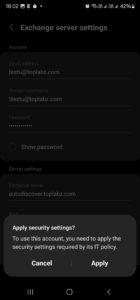
Your device will auto-discover the server settings.
When asked to Apply security settings, click ‘Apply’
Choose your synchronization settings and click ‘Done’
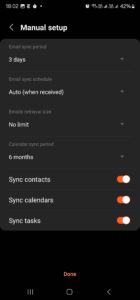
Finally choose an account name.
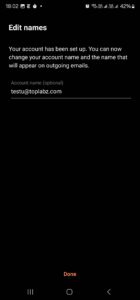
Your Samsung Mail, Calendar and Contacts apps are now connected to your thermotechno.eu account.
Configuring Android Mail/Calendar/Contacts
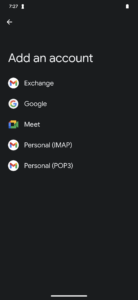
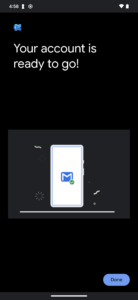
Go to the ‘Settings’ app on your Android device. Click ‘Passwords and Accounts ’ Choose ‘Add account’ and choose account of type ‘Exchange’.
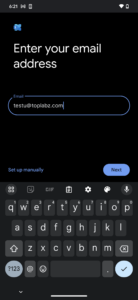
Fill in your email address.
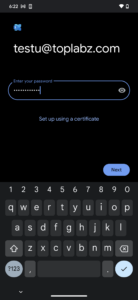
Fill in your password.
Your Android Mail, Calendar and Contacts apps are now connected to your thermotechno.eu account. You can find your email in the Gmail app.
Configuring Outlook for Mobile on Android
Install Outlook Mobile Client from the Google Play Store.
Open Outlook Mobile Client and click ‘Add Account’
Fill in your email address: firstnamel@toplabz.com
The device will auto-discover the email service. On top of the screen it should say ‘Connect Exchange’. It may happen that the device discovers a different service. If on top of the screen it says ‘Connect IMAP’, please click the ? besides the message and choose ‘change account provider’.
Now choose ‘Exchange’
Now complete following data:
Email address: firstnamel@toplabz.com
Password: Your password
Description: choose a name
Server: mail.toplabz.com
Domain: toplabz.com
Username: firstnamel
Outlook on your Android device is now connected to your toplabz.com mailbox
Configuring Apple iOS/iPadOS Mail/Calendar/Contacts
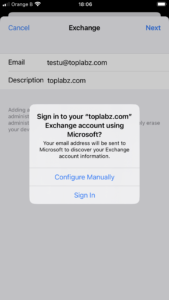
Go to the ‘Settings’ app on your Apple device. Click ‘Mail ’, and then ‘Accounts’, now Choose ‘Add account’ and choose account of type ‘ Microsoft Exchange’.
Fill in your email address and a description for the account. After Clicking ‘Next’, please click ‘Sign in’ and provide your password.
You can now select the services you want to connect.
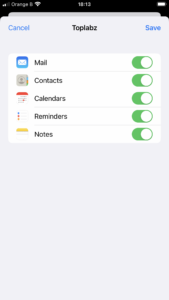
After this, you Mail, Calendar and Contacts apps are now connected to your toplabz.com account.
Configuring Outlook for Mobile on Apple iOS/iPadOS
Install Outlook Mobile Client from the App Store.
Open Outlook Mobile Client and click ‘Add Account’
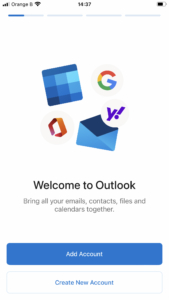
Fill in your email address: firstnamel@toplabz.com and click sign-in
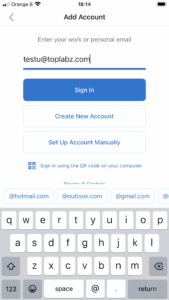
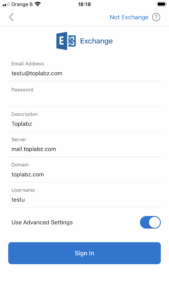
Now complete following data:
Email address: firstnamel@toplabz.com
Password: Your password
Description: choose a name
Server: mail.toplabz.com
Domain: toplabz.com
Username: firstnamel
Click ‘Sign In’, Outlook will now be connected to your toplabz.com account.
Configuring generic mobile clients
Name: Firstname Lastname
Email address: firstnamel@toplabz.com
Username: firstnamel
Password: Your password
Domain: toplabz.com
Protocol: Exchange or ActiveSync
Email Quarantine report
You may receive an email from ‘postmaster@netrik.com’ with your daily spam report.
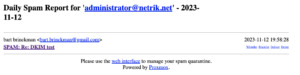
This is a list of messages that were sent to you but were considered as SPAM by the SPAM filters and quarantined. For each of the messages, you can choose an action (deliver , delete, whitelist, blacklist) or you can do nothing, in which case the message will be auto-deleted after 7 days.
You can find the actions to the right of each message, they are as follows:
– Whitelist the sender: so in future email from this sender will not be considered SPAM.
– Blacklist the sender: so in future email from this sender will always be considered SPAM.
– Deliver the email: deliver the email to your inbox
– Delete the email: deletes the email from quarantine. If you leave the email in quarantine, it will be deleted automatically after 7 days
Email Quarantine service
Go to https://portal.toplabz.com and click the ‘Email Quarantine’ button, or you can go directly to https://quarantine.toplabz.com
Login with:
– Email address: firstnamel@toplabz.com
– Password
In this interface you are able to:
– Choose to deliver or delete message that have been put in quarantine by the SPAM filter
– Whitelist or blacklist certain email addresses
1. Whitelist: bypasses spamfilter and always delivers email from this address
2. Blacklist: considers all email from a certain address as SPAM
Sending and receiving email from an alias email address
By default all email you send will be sent from your primary email address. If your mailbox has one or more alias email addresses defined, all email sent to an alias will be received in your mailbox automatically.
If you want to send an email from an alias address instead of your primary email, you need to use the ‘From’ header in webmail, deskapp or your email client.

After pressing the ‘From’ button, you can now enter the alias address you want to send from in the From field.
Appointments & Polls
Introduction to Dudle Appointments and polls
Dudle appointments and polls allows you to send out polls that allow you to:
1. Get an answer for one or more multiple choice questions from the respondents (polls)
2. Get an answer on an available time to schedule an appointment, meeting or event (appointments)
Cloud Storage
Logging into Nextcloud
you can access cloud storage by clicking the cloud storage button in Toplabz portal or directly on https://cloud.toplabz.com
In the login screen you will have 2 options to log in:
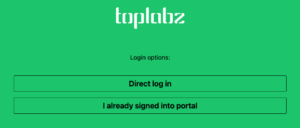
1) Direct log in: Here you will be required to enter your username and password.
2) I already signed into portal: If you are already signed into portal you can clikc here and you will no longer be required to provide your credentials and the application will open immediately
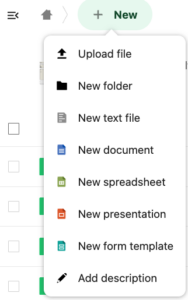
Uploading & Creating files
You can upload a file from your computer or create a new file or folder in the cloud by clicking ‘New’
Editing files
When you click on a file, and online editor will be opened, and you can edit the file collaboratively online. If the online editor/viewer does not support the file, the file will download.
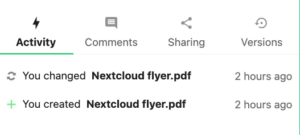
File activity
Click on the ‘Share’ item or the name of the user that shared

and you can see the user activity on a file or folder
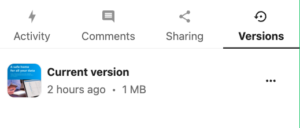
File versioning
Click on the ‘Share’ item or the name of the user that shared
and you can see the versions of a file, and download previous versions of the file.
Sharing files
Click on the ‘Share’ item or the name of the user that shared
and you can manage sharing files and folders with other users and groups.
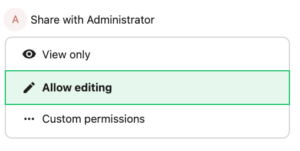
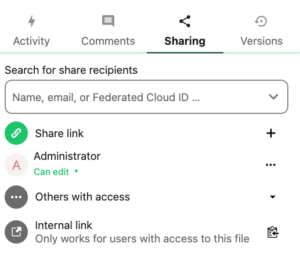
You can share to multiple people and groups and manage permissions (view/edit)
Syncing files to your desktop
You can sync your files in the cloud to your desktop. This allows you to work on the files just like hey are local files, but htey are automatically synced to the cloud. You can also edit files offline, and as soon you are back online, your files are synced to the cloud.
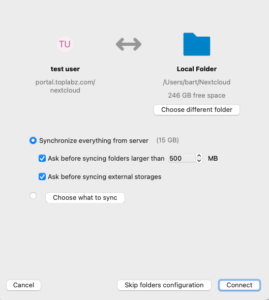
In order to set up desktop sync, you need to install Nextcloud desktop client, which is available in the downloads section of the Toplabz portal.
After installation, you will be requested to enter your cloud server address. Please enter: https://portal.toplabz.com/nextcloud
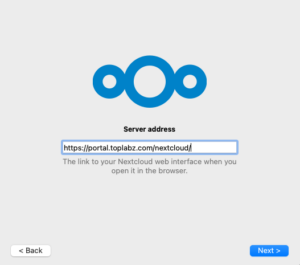
After pressing ‘Next>’, you will be redirected to your browser and asked to log in.
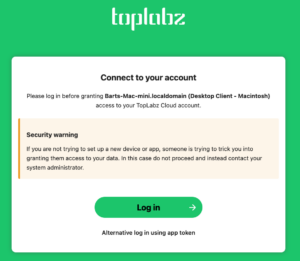
See ‘Logging into Nextcloud’ to find more information on how to log into Cloud Storage. After logging in you will get a message that you successfully connected your account into the desktop sync service.

Your Cloud files will now be available in a folder called ‘NextCloud’ in your home directory. You can edit the files like they are local files and the desktop sync service will keep them synchronized with the cloud.
Accessing files from your mobile device
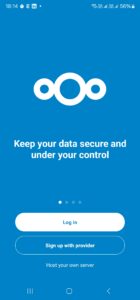
You can access your files from an iOS or android device by means of the Nextcloud app. In order to get access to your cloud files on these mobile platforms, you need to install Nextcloud app, you can find a link in the downloads section of the Toplabz portal.
After installation, open the app and click ‘Login’
In the next screen, you will be requested to enter your cloud server address. Please enter: https://portal.toplabz.com/nextcloud

After pressing ‘Next>’, you will be asked to log in.
See ‘Logging into Nextcloud’ to find more information on how to log into Cloud Storage. After logging in you will get a message that you successfully connected your account.
Your Cloud files will now be available in the Nextcloud app.
Using files in webmail
You can directly integrate cloud storage in webmail or deskapp, so you do not have to download a file to attach it to an email, but can directly attach it from the cloud.
Here is how you configure this in webmail or deskapp. Go to ‘settings’ in the top right of your screen. Then from the menu on the left, select ‘Files’. You will see a table with connected account that is empty. Click ‘Add Account’ to add your cloud storage account
You will now be asked to provide details about your account.
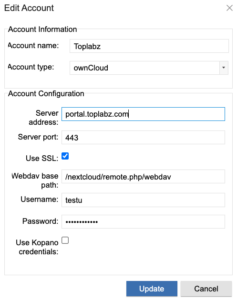
Please complete with following information:
– Account name: Toplabz (you can choose)
– Account type: owncloud
– Server address: portal.toplabz.com
– Server port: 443
– Use ssl: yes
– Webdav base path: /nextcloud/remote.php/webdav
– Username: your username
– Password: your password
– Use Kopano credentials: No
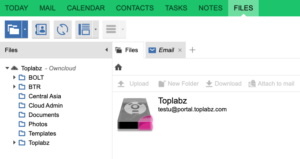
After you have completed this, you will be brought back to the accounts list, and now you should see your Toplabz account with a green ball next to it:

You can now go to the main menu and explore your files in Cloud Storage in the ‘FILES’ menu
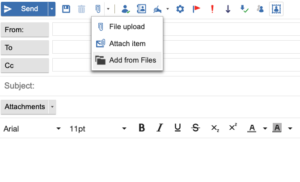
When writing an email, you can now also attach files to the email directly from the cloud:
Webmeetings
Setting up a webmeeting
In order to set up a webmeeting, pls click the ‘Webmeeting’ icon in Toplabz portal, or go directly to https://meet.toplabz.com
To set up a webmeeting, please invite users to the meeting by sending them a link comprised of: https://meet.toplabz.com/<meetingname>
For example: htttps://meet.toplabz.com/testmeeting
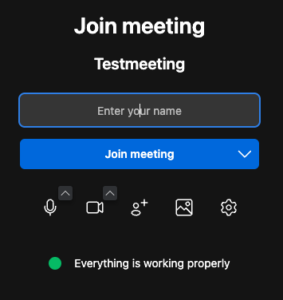
When you want to start the meeting, enter the meeting name in the Jitsi webmeetin UI, like below:
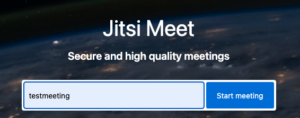
This will start your meeting, and other participants will now be able to join with the link you have sent them.
Toplabz users are able to create meetings and invite external users by sending them the link. External users cannot create meetings
Joining a webmeeting
You can join a webmeeting that someone else has set up by clicking the link the meeting organizer has sent you, for example: htttps://meet.toplabz.com/testmeeting
When you join the meeting, you will be asked to enter your name.